Below are the direct links to the iPod Firmware Files for every released firmware version.
Please note that if you use Safari you must disable the auto unzip feature (Safari->Preferences->General->Uncheck "Open Safe Files After Downloading") , or just use a different browser type.
On Tuesday, Apple released firmware 3.1.3 for the iPhone and iPod touches. Unless you’ve personally observed a problem with the reporting of your battery percentage, there’s no reason to update to 3.1.3. We know some of you will want to anyway. Superbowl Sunday’s PwnageTool 3.1.5 for Mac OS X will let you do so safely, preserving your jailbreak and ultrasn0w unlock. (If you use the blacksn0w unlock (at baseband 05.11.07), you need to stay at 3.1.2.)
iPhone 3G and 3GS unlockers should always be very wary to update their firmware. This is no exception. If you make a mistake along the way you may find yourself updating to official 3.1.3 in which case you will lose your unlock, possibly forever.
iPhone 3GS users (regardless of unlock) should stay away from this and all 3.1.3 jailbreak tools unless you know you have your “SHSH hashes” backed up via Cydia. That’s because if you make a mistake you may find yourself stuck at official 3.1.3 with no way to jailbreak or come back down to 3.1.2 to jailbreak.
If you really truly feel that you need to update, this version creates a custom 3.1.3 IPSW for you to restore to on your iPhone 2G, iPhone 3G, iPhone 3GS with early bootrom, iPod touch 1G, and iPod touch 2G with early bootrom. If you don’t know if you have an early bootrom or not, please avoid updating until you learn more.
You don’t need to be pre-jailbroken on anything but the iPod touch 2G early bootrom. And really for that device, it’s faster and easier to use redsn0w 0.9.4 as mentioned in our last post. For that matter, if you have an ipt1g, iphone2g, or iphone3g(and don’t need an unlock), you should use redsn0w too (but version 0.9.3). It’s faster and you won’t have to go through a full restore process (just do an update then run redsn0w, pointing it at 3.1.2 FW instead of 3.1.3).
If you have an iPhone 3GS, PwnageTool works if you’re currently at version 3.1.2 or below (down to 3.0). You don’t need to be already jailbroken — PwnageTool will ask you if you’re jailbroken after you’ve created the IPSW. Don’t use PwnageTool on the iPhone 3GS if you’re at 3.1.3, it just won’t work. Downgrade to 3.1.2 using the methods described here. If you can’t downgrade because you don’t have your 3GS 3.1.2 hashes on file with Cydia, you’ll need to sit out the 3.1.3 jailbreak.
We aren’t revealing any new exploits to Apple with this jailbreak. Everything here has been used before, it’s just a straightforward port of Pwnage2 and 24Kpwn to the new firmware. It’s possible the new firmware was released largely to flush out new exploits before the next big release. We won’t be biting.
We’d really like the above warnings and disclaimers to sink in. Please don’t download the files below and use them blindly.
Please feel free to ask any questions in the comment section below. We’ve got a bunch of expert help there, including our friendly moderators confucious and angie!
The following links are unofficial download mirrors, you download these archives at your own risk, we accept no responsibility if your computer explodes or if it becomes part of a NASA attacking botnet or even worse if your hands fall off mid-way during the use of these files. We do not check these links and we accept no responsibility with regard to the validity of the files, the other content that these links may provide or with the content that is on the third-party linked site.
Always check the files that you have downloaded against our published SHA1 hash. We would prefer that you downloaded the official bittorrent release that is linked above, but you are welcome to try these if you really must. Mirror owners should email direct download links only (no rapidshare or filesharing sites please) to blog@iphone-dev.org — please don’t place mirrors in the comments as they will be deleted.
Before we begin, please take some time to review the notes below as they are very important:
- The methods listed below can be followed on BOTH PC and Mac users.
- Your iPhone/iPod Touch must be updated to firmware 3.1.2 via iTunes before beginning this process.
- For users that already have a jailbroken device and want to keep their jailbroken apps, before you begin the process below, download “AptBackup” from Cydia and back up your jailbroken apps. Now connect your device to iTunes and backup your device using the iTunes backup process. After you do the jailbreak process below, redownload AptBackup from Cydia and plug your device into your computer. Using AptBackup, restore your apps.
- If you are already jailbroken and/or unlocked and have problems with WiFi, GPS or Youtube, click here.
The following is how to Jailbreak and Unlock the iPhone 3G/3GS on 3.1.2 Firmware
1.) Plug your iPhone into iTunes, do a backup and then click “Update” to install firmware 3.1.2. After the update, eject your iPhone from iTunes using the “eject” button and close iTunes. Leave your iPhone connected to your computer.
2.) Click on the PC or Mac links to download Blackra1n for PC or MAC. Save the file to your computer desktop.
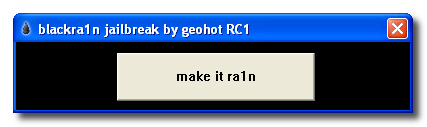
3.) Locate the downloaded file “Blackra1n” and double-click on it. Click on "Make it ra1n" to launch the tool.
4.) Your iPhone will now enter into Recovery Mode. If iTunes opens, simply close it.
5.) After the reboot, Blackra1n will indicate that your iPhone has been jailbroken. Click “OK”. You can also close Blackra1n now if it is still open.
6.) Once at your iPhone home-screen, go to Settings > WiFi and turn on WiFi.
7.) On your iPhone home-screen, you will see a new Blackra1n icon. Tap on it.
8.) When Blackra1n opens, tap on Cydia (or Rock) and tap “Install” in the top right corner.
9.) Cydia (or Rock) will now be visible on your iPhone home-screen. Your iPhone is now Jailbroken.
How to Unlock the iPhone 3G/3GS
1.) On your iPhone home-screen, tap on the Blackra1n icon.
2.) In the Blackra1n app, tap on “Sn0w”. Your iPhone will now be unlocked.
Note: You may go back into the Blackra1n app on your home-screen and use the Uninstall toggle to remove the Blackra1n app from your home-screen. This does not affect the jailbreak or unlock.
The following is how to Jailbreak and Unlock the iPhone 2G on 3.1.2 Firmware
1.) Plug your iPhone into iTunes, do a backup and then click “Update” to install firmware 3.1.2. After the update, eject your iPhone from iTunes using the “eject” button and close iTunes. Leave your iPhone connected to your computer.
2.) Click on the appropriate link for PC or MAC and download Blackra1n. Save the file to your computer desktop.
3.) Locate the downloaded file “Blackra1n” and double-click on it. Then click on the "Make it Ra1n" button.
4.) Your iPhone will now enter into Recovery Mode. If iTunes opens, simply close it.
5.) After the reboot, Blackra1n will indicate that your iPhone has been jailbroken. Click “OK”. You can also close Blackra1n now if it is still open.
6.) Once at your iPhone home-screen, go to Settings > WiFi and turn on WiFi.
7.) On your iPhone home-screen, you will see a new Blackra1n icon. Tap on it.
8.) When Blackra1n opens, tap on Cydia (or Rock) and tap “Install” in the top right corner.
9.) Cydia (or Rock) will now be visible on your iPhone home-screen. Your iPhone is now Jailbroken.
How to Unlock the iPhone 2G
1.) On your iPhone home-screen, tap on the Blackra1n icon.
2.) In the Blackra1n app, tap on “Cydia” to install Cydia. (If you already installed Cydia, move to Step 3)
3.) Cydia will prompt you for updates. Tap on “Complete Upgrade” and install them all.
4.) In Cydia, search for the app “BootNeuter” and install the app.
5.) Open BootNeuter and make sure the settings match the image below:
6.) When the settings match the above image, tap on “Flash” in the top right corner. The iPhone 2G will now be unlocked.
Note: You may go back into the Blackra1n app on your home-screen and use the Uninstall toggle to remove the Blackra1n app from your home-screen. This does not affect the jailbreak or unlock.
The following is how to Jailbreak the iPod Touch on 3.1.2 Firmware
1.) Plug your iPod Touch into iTunes, do a backup and then click “Update” to install firmware 3.1.2. After the update, eject your iPod Touch from iTunes using the “eject” button and close iTunes. Leave your iPod Touch connected to your computer.
2.) Click on the appropriate link for PC or MAC and download Blackra1n. Save the file to your computer desktop.
3.) Locate the downloaded file “Blackra1n” and double-click on it. Click on the "Make it Ra1n" button.
4.) Your iPod Touch will now enter into Recovery Mode. If iTunes opens, simply close it.
5.) After the reboot, Blackra1n will indicate the your iPod Touch has been jailbroken. Click “OK”. You can also close Blackra1n now if it is still open.
6.) Once at your iPod Touch home-screen, go to Settings > WiFi and turn on WiFi.
7.) On your iPod Touch home-screen, you will see a new Blackra1n icon. Tap on it.
8.) When Blackra1n opens, tap on Cydia (or Rock) and tap “Install” in the top right corner.
9.) Cydia (or Rock) will now be visible on your iPod Touch home-screen. Your iPhone is now Jailbroken.
Note: You may go back into the Blackra1n app on your home-screen and use the Uninstall toggle to remove the Blackra1n app from your home-screen. This does not affect the jailbreak.
The following is how to Revert Your iPhone 2G/3G/3GS or iPod Touch Back To “Normal”
1.) Open iTunes and plug your iPhone 2G/3G/3GS or iPod Touch in via the USB. Backup your iPhone/iPod Touch if iTunes allows you to.
2.) When iTunes recognizes the iPhone/iPod Touch, click on the “Restore” button in iTunes. This will restore your iPhone/iPod Touch with fresh 3.1.2 firmware.
3.) After the restore is complete, iTunes will prompt you to Set up a New Device or Restore from Back Up from an existing backup (the backup from step 1). Choose which ever method you want and let iTunes process.
4.) After the processing is complete, your iPhone/iPod Touch will be loaded with the fresh 3.1.2 firmware or loaded with your back up that you may have chosen.
5.) Eject the iPhone/iPod Touch from iTunes using the “eject” button and disconnect the USB cable from the iPhone/iPod Touch. Turn the iPhone/iPod Touch off and then turn the iPhone/iPod Touch back on.
Use Bonus Code: TGiPJB for 100% up to $100 on 1st Deposit
Read the whole post in full before attempting anything!
redsn0w is an easy to use, multi-platform, multi-device jailbreaking and unlocking tool for the iPhone 2G (original iPhone), the iPhone 3G/3GS and also the iPod touch (first and second generation). It is available for Linux, Mac OS X and Windows.
REDSN0W PROVIDES SIMILAR FUNCTIONALITY TO QUICKPWN.
If you want to build custom firmware files with more flexibility it is suggested that you use ‘PwnageTool’ on Mac OS X.
1. UltraSn0w has been released via APT (cydia and icy), you can use that to unlock your iPhone. 2. Yellowsn0w has been replaced with Ultrasn0w which has been released via APT (this means you will be able to get it via Cydia or Icy). 3. Please read all parts of this post before downloading and using these tools. 4. Read items 1, 2 and 3 again and again. 5. At the bottom of this post are the bittorrent files for the latest version of redsn0w. 6. This app is suitable for the 3.0 release 7. redsn0w WILL work for all iPhones (the original type), Original iPod touch, iPod touch 2G and the iPhone 3G (and the iPhone 3GS). To use redsn0w simply upgrade the device in iTunes to firmware version 3.0 and run redsn0w to activate and jailbreak the device (and if you are using an original iPhone 2G, it will unlock it too!)
The following links are unofficial download mirrors, you download these at your own risk, we accept no responsibility if your computer explodes or if it becomes part of a NASA attacking botnet or even worse if your hands fall off mid-way during the use of these files. We do not check these links or archives and we accept no responsibility with regard to the validity of the files, or with other content these links provide or with the content that is on the linked site. Always check the published SHA1 sums. We would prefer that you downloaded the official bittorrent release that is linked above, but you are welcome to try these if you really must. Mirror owners should email direct links only to blog@iphone-dev.org , please don’t place mirrors in the comments as they will be deleted.
Mac
Windows
Linux
Use Bonus Code: TGiPJB for 100% up to $100 on 1st Deposit
Read the whole post in full before attempting anything!
redsn0w is an easy to use, multi-platform, multi-device jailbreaking and unlocking (iPhone 2G only) tool for the iPhone 2G (original iPhone), the iPhone 3G (but not the 3GS) and also the iPod touch (first and second generation). Currently it is available for Windows and Mac OS X (there are some issues using redsn0w with OS X PPC, please use an Intel Mac until we have this problem resolved).
REDSN0W PROVIDES SIMILAR FUNCTIONALITY TO QUICKPWN.
If you want to build custom firmware files with more flexibility it is suggested that you use ‘PwnageTool’ on Mac OS X.
GOLDEN RULE: If you are using a 3G iPhone with yellowsn0w and rely on yellowsn0w to obtain cellular service, then you should NOT use redsn0w right now. Ultrasn0w (the 3G carrier unlock) is not included with this release and therefore your baseband will be locked and unable to use an operator other than the official one it was bought for. UltraSn0w will be released via APT (cydia and icy) soon. If you have an original iPhone (1st generation) then 3.0 carrier unlock works with this redsn0w release. Yellowsn0w in its current form will NOT work with the baseband version that is present in the 3.0 update, you will need Ultrasn0w, which will be released sometime soon, Ultrasn0w will work with all iPhone 3G models (but not 3GS), even ones that were previously unlockable, Ultrasn0w (when available) will be released via APT (this means you will be able to get it via Cydia or Icy). Please read all parts of this post before downloading and using these tools. Read items 1, 2 and 3 again and again. At the bottom of this post are the bittorrent files for the latest version of redsn0w. This app is suitable for the recent 3.0 release redsn0w will NOT work for the iPhone 3GS. redsn0w WILL work for Original iPhone (1st Generation), Original iPod touch, iPod touch 2G and the iPhone 3G (not the iPhone 3GS). To use redsn0w simply upgrade the device in iTunes to firmware version 3.0 and run redsn0w to activate and jailbreak the device (and if you are using an original iPhone 2G, it will unlock it too!)
The following links are unofficial download mirrors, you download these at your own risk, we accept no responsibility if your computer explodes or if it becomes part of a NASA attacking botnet or even worse if your hands fall off mid-way during the use of these files. We do not check these links or archives and we accept no responsibility with regard to the validity of the files, or with other content these links provide or with the content that is on the linked site. Always check the published SHA1 sums. We would prefer that you downloaded the official bittorrent release that is linked above, but you are welcome to try these if you really must. Mirror owners should email direct links only to blog@iphone-dev.org , please don’t place mirrors in the comments as they will be deleted.
Now that you have a Jailbroken iPhone / iPod Touch you can make the changes and customizations you want. The following post will show you what you need and "how to" make these changes. Make sure you have a WiFi connection, your gonna need it.
Step 1
Ok, the 1st thing you need is an interface for you PC and iPhone. The easiest program is WinSCP which you can find by clicking HERE or copy and past this link--- http://www.soft82.com/download/windows/WinSCP ---in a new browser.
Step 2
Install Win SCP
Step 3
Now you need to set up WinSCP so it can interface with your iPhone / iPod Touch. To do this you will need you iDevice's IP Address. To locate the IP address usign your iDevice go to setting / Wi-Fi / choose your network / and there is your IP Address. Write it down. Launch WinSCP and you will get a window that looks like this:
In the "Host Name" field, enter your IP address In the "User Name: field, enter "root" In the "Password" field, enter "alpine"
Make sure in the Protocol Section that SFTP is selected and there is a check mark for "Allow SCP Fallback"
Click "SAVE" and name your connection something like "My iPhone" or whatever you want.
Step 4
On the iDevice, open Cydia. Do a search for Toggle SSH and Automatic SSH and install them.
Step 5
Again on the iDevice, go to Toggle SSH which has an icon that looks like this:
Launch it, and click on enable. The screen will not do anything except the enable button will light up for a second.
Step 6
Launch WinSCP and login. Remember, the password is "alpine". You will then see a screen that looks like this:
The right of the screen shows folders in your iDevice. The left side is your PC.
You are now ready to install cracked games and applications to your iDevice. These typically have a file extension of .ipa
My next post will give easy step by step instuctions to get those games and apps on your iDevice.
These step by step instructions will assist you in Jailbreaking your iPhone or iPod Touch. It is very easy and does not take long to do. These instructions are to be used at your own risk. If at any time you want to reverse this, just click restore via iTunes.
****Note---> If you are running on firmware 2.2.1 DO NOT USE THESE INSTRUCTIONS!!! Please refer to the post in this Blog on Friday, January 30, 2009 titled: **UPDATE** 2.2.1 Firmware Jailbreak. If you are 2.2 or prior, you can use these instructions!
Step 1
Download Quickpwn by clicking on the following link HERE
Or copy and past the link below in a new browser
http://thepiratebay.org/user/iphonedev/
The link leads to a torrent site. If you don't know what that is. Google it!
Step 2
Connect your powered on iPhone / iPod Touch to your PC
Step 3
Launch iTunes
Step 4
Make sure you have the latest iPhone Firmware. At the time this is being posted, that would be 2.2
Step 5
Leaving iTunes on, launch QuickPwn
Step 6
Follow the QuickPwn instrcutions (if you make a mistake you can go back and do it again) There is timing involved in holding either the home or power buttons alone or at the same time for a small amount of time, so be prepared.
Step 7
Make sure you select Cydia and Installer to be added to your device Apps. You will need these for later.
Step 8
Power cycle your device and you are done!
The next post will give ways to take advantage of a Jailbroken iPhone / iPod Touch.